Video Navigator
-
1
-
2
-
3
-
4
-
5
-
6
-
7
-
8
-
9
-
10
-
11
Selecting Cap
- Place one end of the measuring tape between the participant’s eyebrows and circle around the back of the head at the widest part.
- Try the cap on the participant to check the fit before you attach the electrodes.
- If you aren’t satisfied with the fit, for example, the electrodes land on the ear as opposed to behind the ear, you can switch from an oval cut cap to a round cut cap if available.
Preparing Cap
- Make sure the wires are untangled by gently shaking the electrode bundle and avoiding knocking the pellets against each other or against hard surfaces.
- Always hold the electrode by the head, never by the wire.
- Plug the electrodes into the holders.
- Match the label on the holder with the corresponding label on the electrode.
- Guide the electrode in from back to front to avoid catching the pellet on the back of the holder.
- Be careful to avoid stretching out the cap, and be sure that you insert the electrodes all the way into the holders.
Plugging in Electrodes
- Peel the paper off of the top of the thick electrode collars.
- Attach a thin electrode collar to the thick electrode collar. Repeat this process for the remaining electrodes.
- With the electrode collars still attached to the strip, peel the paper off of the sticky part of the thin electrode collars and attach the electrode.
- Make sure the wire is lined up with the tabs of the electrode collars.
- The electrode sensor should be completely exposed in the center of the electrode collar.
Prepping Face Electrodes
- Clip the splitter box to the back of the participant’s shirt or to a towel draped over their shoulders.
- It’s helpful to have the participant hold the EOG and ground electrodes to protect them from contacting hard surfaces and to keep them from getting tangled.
- Place the cap onto the participant’s head, starting from the forehead.
- Do not to tug on the cap or the electrodes.
- Make sure the tag is not tucked into the cap.
- Prep the participant’s skin for the EOG electrodes with an alcohol swab.
- One horizontal EOG electrode will be placed next to the outer canthus of each eye and one vertical EOG electrode will be placed below the right eye close to the cheekbone.
- Make sure the ‘z’ row is lined up directly along the mid-sagittal plane of the head
- When readjusting the cap, use both hands to slide the cap into place. Do not pull individual electrode holders when adjusting the cap.
- Measure the mid-sagittal distance between the Nasion and Inion
- The Cz electrode channel should be exactly halfway between the Nasion and Inion.
Capping the Participant
- Place your thumb on the edge of the reservoir and rest the needle on your thumb to provide stability and prevent the tip from touching the pellet.
- Fill the reservoir of the electrodes completely with gel.
- Once they are filled, remove the electrode and collar unit from the strip.
- Place the EOG electrodes.
- Place the Left and Right HEOG electrodes so they are in line with the center of the eye near the outer canthus. The HEOG electrodes should be placed vertically, so the wires point down towards participant’s shoulders.
- Place the VEOG electrode below the right eye far enough down that it doesn’t interfere with the participants vision when they look directly straight ahead. The VEOG electrode should be placed horizontally with the wire pointing towards the ear.
Gelling
- Show the participant that the syringe tips have a blunt end, and that the process should not be painful.
- While holding the electrode in place, insert the syringe tip through the notch of the electrode so the syringe touches the scalp and gently swirl the syringe in a circle.
- With the syringe tip in contact with the head, begin pushing gel out of the syringe. As gel leaves the tip of the syringe, smoothly pull out the syringe so there is a solid column of gel connecting the skull to the electrode sensor.
- The gel should just reach the top of the electrode without overflowing.
- If you can see the cap is absorbing gel, you have filled the bottom of the electrode with too much gel.
- Continue to gel every electrode location.
Testing Chamber
- Lead the participant into the testing chamber, making sure the ground electrode does not touch the floor.
- Clip the splitter box to the back of the chair and set up battery and amplifier.
- Plug electrode set into the appropriate port on the amplifier, making sure the arrow on the plug of the electrodes lines up with the arrow on the port on the amplifier.
- Plug the ground wire into the socket labelled “GND” on the amplifier.
- Connect the battery to the amplifier.
Impedance
- Test the electrode impedances by choosing impedance mode on the EEG recording software.
- Green lights indicate that the impedance is below threshold
- Yellow lights indicate that the impedance is close to the threshold.
- Red lights indicate that the impedance is above threshold.
- Adjust the ground electrode and the first electrode in the set before adjusting other electrodes.If impedance levels remain high, insert the syringe tip into a high impedance electrode, and while making contact with the scalp, gently swirl the tip in a circular fashion.
- Remain patient! Impedances change over time, so come back to a troublesome electrode after adjusting others.
- Adding more gel should be the last resort. If necessary, add additional gel in small increments, swirling in between each addition.
Removing the Cap
- Carefully unplug the splitter box and ground electrode from the amplifier.
- Plug it into the charging source right away.
- Have the participant unstrap the cap. Remove the EOG electrodes by placing one finger on the face near the electrode and peeling off the electrode.
- Hold the electrode by the base, not the wire.
- Gently remove the cap, starting from the forehead.
- Place the cap aside on a towel.
- If possible for your lab setup, ask the participant if they would like their hair washed.
Cleaning the Cap
- Place a towel on your work surface to protect the electrodes.
- Hold the electrodes by the base and use the electrode removal tool to carefully leverage them out of the holder.
- Hold the electrode by the base, not the wire.
- Prep the electrode set for washing by moving the sliders towards the electrodes.
- Place electrodes in a plastic colander in the sink, making sure the ground plug and splitter box do not get wet.
- Wrap the splitter box and ground in a towel and anchor it behind the faucet to ensure that they do not fall into the sink.
- Rinse electrodes in warm water.
- Remove all gel. If necessary use a soft toothbrush.
- If disinfection is required, place the electrodes in Envirocide to sterilize and let sit for 1-2 minutes. After removing from the envirocide, re-rinse the electrodes to make sure all of the residue is removed.
- Hang the electrode set to dry. Ensure that the splitter box is above the electrodes so it doesn’t get wet.
- Rinse the cap in cold water.
- It helps to flip the cap inside out, as the gel is mostly on the inside of the cap.
- Use a small amount of baby shampoo if desired.
- If disinfection is required, place the cap in Envirocide for 1-2 minutes. After the cap has been disinfected, rinse off the envirocide until no suds remain.
- Hang the cap to dry by the strap to avoid stretching the cap. A fan can help speed the drying process.
Credits
- Directed and Edited by: Jake Cardwell & Eliz Akin
- Participant: Patrick Sutphin
- Experimenter: Matthew Strange
- Advising by: Dr. Cindy Bukach & Olivia Stibolt
- Narration by: Jake Cardwell
- Music by: Jake Cardwell
- Special Thanks to: Kira Bartnick, Christopher Cotter, Brianna Charlton, Thalia Viranda
Additional Information
Equipment & Supplies
| Combs/Brushes | 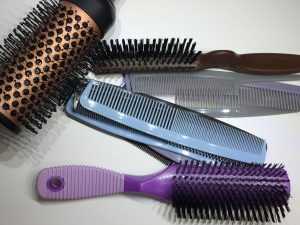 | Combs and/or brushes are necessary for combing the participant’s hair prior to placing the cap on their head. |
| Rubber Gloves | 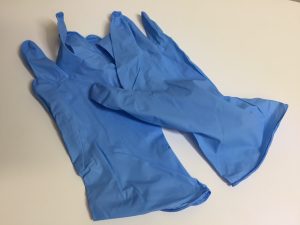 | Gloves are necessary to ensure the cap is clean, and to protect the researcher’s hands from the gel and cleaning solution. Specifications: – Powder Free – Latex Free |
| Thin Electrode Collars | 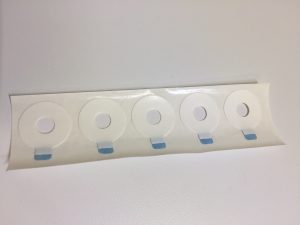 | Also referred to as adhesive disks, the thin electrode collars serve as a barrier between the styrofoam electrode collars and the external electrodes. Specifications: – Inner Diameter: 8mm – Outer Diameter: 22mm |
| Styrofoam Electrode Collars | 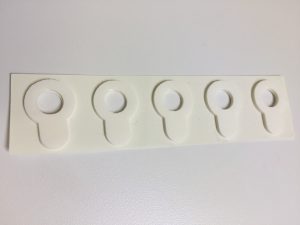 | The styrofoam electrode collars are used to attach the external electrodes to the skin. The styrofoam material of these collars provides a reservoir for the gel. |
| Alcohol Wipes | 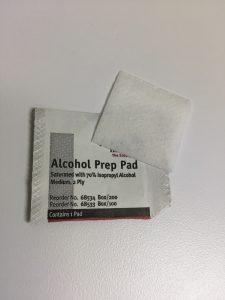 | The alcohol wipes are necessary to clean to the sites where the external electrodes will be attached to the skin. |
| Syringes | 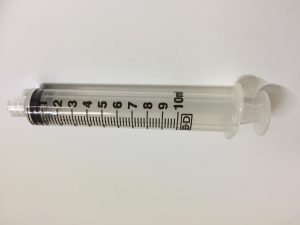 | The syringes are used to administer the gel to each of the electrode channels. Specifications: – 10mL – Luer-lock Tip |
| Syringe Tips | 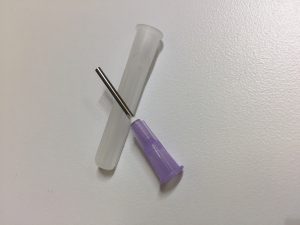 | The syringe tips are attached to the syringes to allow for precise application of the gel. Specifications: – 16 Guage – 1″ Length – Blunt Square Grind |
| Gel | 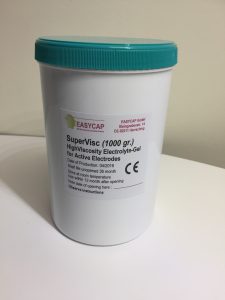 | The gel serves as a bridge that conducts signals from the scalp, to the electrode sensors. Specifications: – AbralytHiCl High chloride, Abrasive Electrolyte Gel – Amount: About 1000g |
| Envirocide | 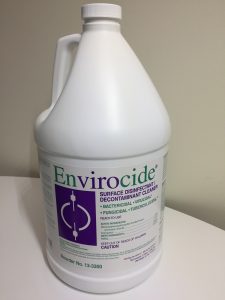 | Envirocide may be used to disinfect the equipment after each participant. Specifications: – Amount: 1 Gallon |
Troubleshooting
Troubleshooting tutorials coming soon!
Pilot Video
This is the first video we made to demonstrate the capping process. Thanks to everyone who contributed time and hard work to make the video!
